
If you are working in a corporate office and dealing with clients in other countries then chances are very high that you might forget what time your client is in. now I am going to show you how to add multiple timezone clocks in Windows 10, this works on Windows 8 and above versions
How to add multiple timezone clocks in Windows 10
- Step 1: Open Windows Settings by clicking the Windows Key + I or you could open the Start menu, type Settings, and click on enter.
- Step 2: Once you have opened the system setting, on the right side, you can see Time & Language, click on that

- Step 3: Once you have opened the Time & language option on the right-hand side you can see an option called Add Clocks For Different Zones, click on that as highlighted in the below picture

- Step 4: Now you get a pop up of the date and time, in that you could see the option like Show this clock Make sure you have checked for the to boxes highlighted in the below image
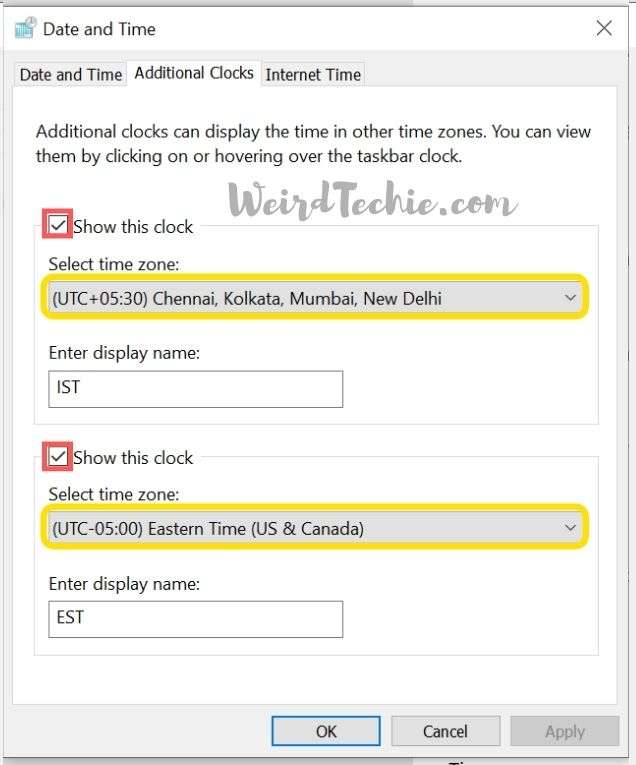
- Step 5: In Select Time Zone you can select the required time zone for you, in this case, I am selecting IST as the first time zone and the second time zone as the EST as most of my clients are in the USA
- Step 6: In Enter Display Name you could enter the name of the time zone or the country name, in my case I have entered as name of the Time Zone. Once everything is done click on Apply and click on OK
- Step 7: After that, you can close everything and click on the time which is on the time is on the right-hand side corner, then you could see the two different time zones as shown in the picture.

That’s all, guys! You can find more tech Guides stuff from here – Weirdtechie-Guides. To keep you updated on the latest technology do check out our Instagram account.
Recommend: How to restrict Wi-Fi data on Windows 10